Haskell Tutoriall Part 2
In this part 2 of our Haskell tutorial, I’m going to show you how to install Haskell from scratch on your computer.
Part 1: Install GHCUP
For this tutorial, we’ll be using ghcup, an all-in one tool to install
the following
- the ghc compiler (haskell’s most popular compiler)
- cabal (haskell’s package manager, similar to npm in javascript)
- stack (a layer around cabal that makes sure packages work together nicely)
- the haskell language server (HLS) (a language server, resposible for things like “go to definition” and intelligent autocomplete)
With that, let’s get into it!
First, go to https://www.haskell.org/ghcup/ and look at their most recent install instructions.
As of October 2023 (writing time of this blog post), the following is the instructions:
curl --proto '=https' --tlsv1.2 -sSf https://get-ghcup.haskell.org | sh
I don’t recommend doing that, because piping curl commands into your shell is just giving remote code execution to some random website.
Instead, maybe try something like this:
curl --proto '=https' --tlsv1.2 -sSf https://get-ghcup.haskell.org > ghcup-installer.sh
take a look at the script to see if there’s anything sketchy in it:
less ghcup-installer.sh
If you’re happy with it (and I was when I last checked), run the file!
chmod +x ghcup-installer.sh && ./ghcup-installer.sh
Part 2: Running ghcup
Now that you’ve got ghcup installed, run the terminal user interface (tui) with the following command:
ghcup tui
You’ll be greeted by something like this:
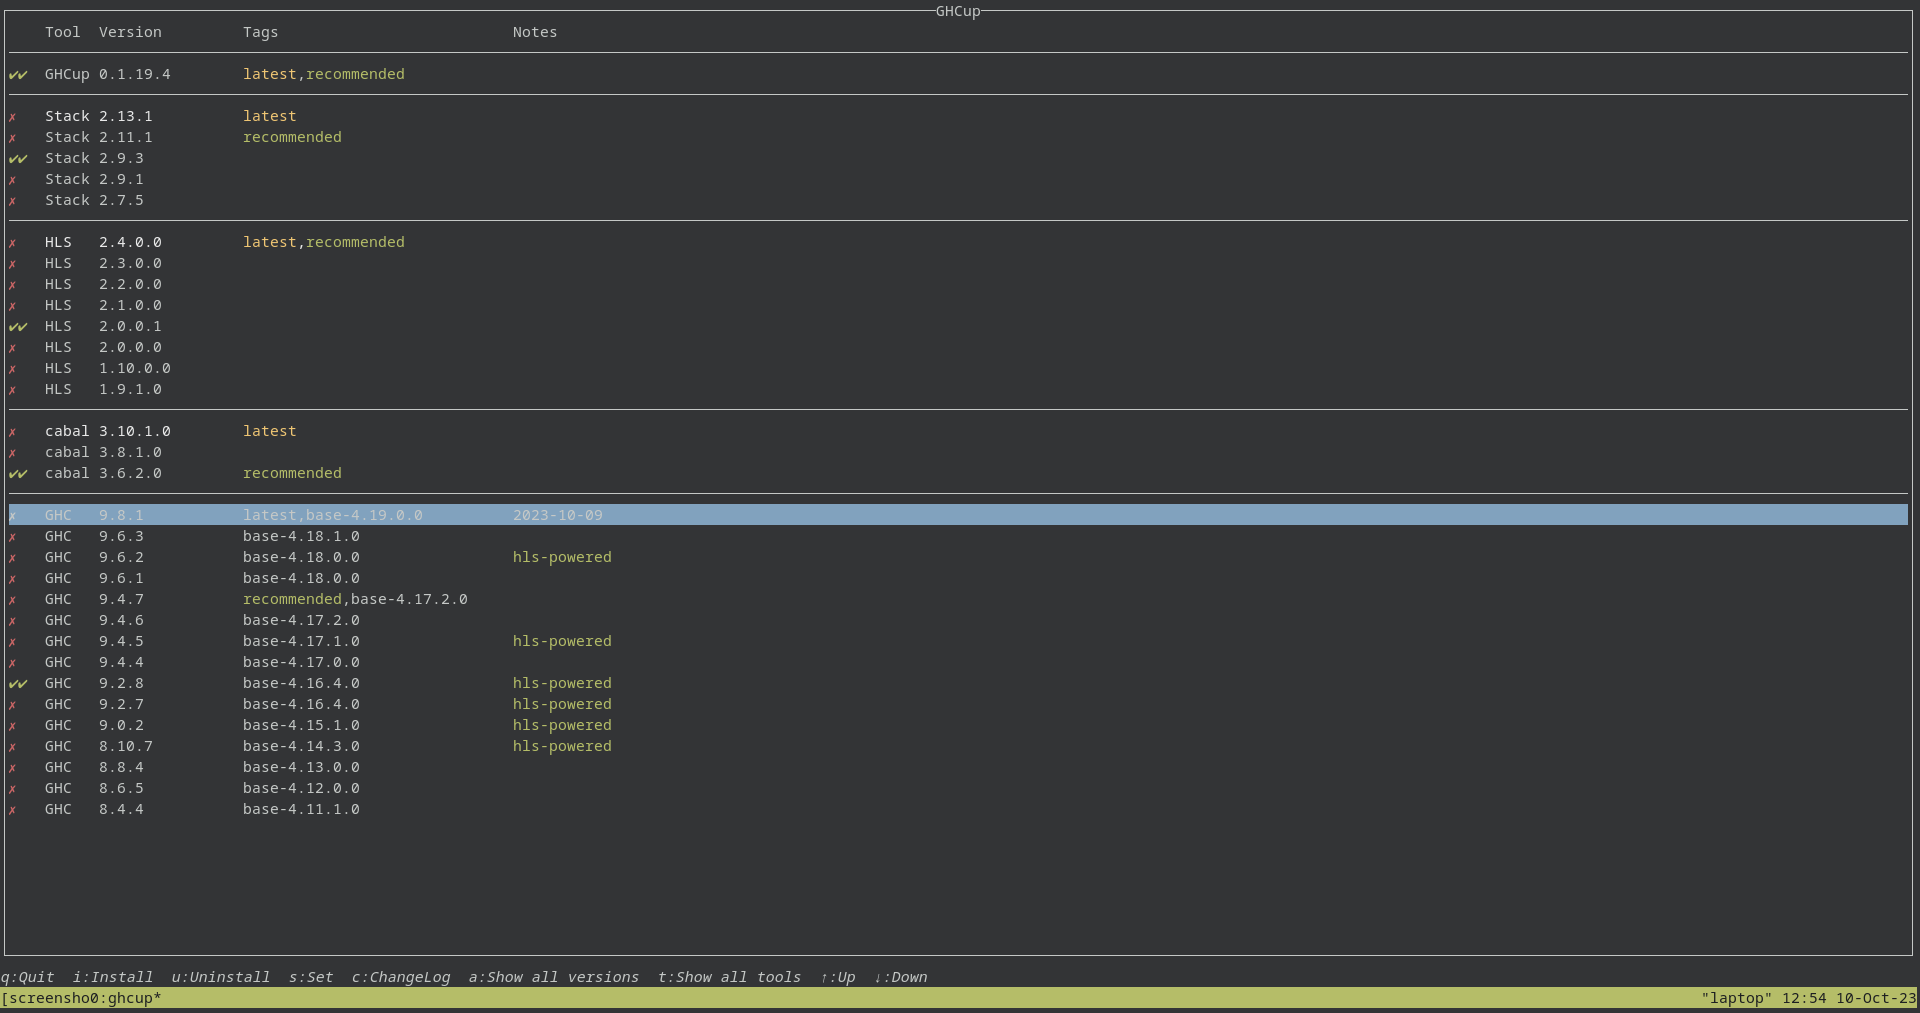
We’re going to install the most recent versions of things by scrolling
to the version of everything that we want and pressing the i key (i for install)
Each install will take a few minutes, so grab a coffee and a few good songs and enjoy.
After each install, set that as the version you want to use with the s key
(s for set).
After you’ve installed and selected the latest ghc, cabal, HLS, stack, and GHCup
version, quit with the q key (q for quit).
Part 3: Running Hello World
Now that we’ve got everything installed, we’ll test everything works with a good old hello world program.
Now, for larger projects, we would want to us stack, cabal, HLS, everything.
However, for the sake of this simple smoke test, we’re not going to use anything extra.
create a file called hello.hs and copy the following line into it:
main :: IO ()
main = putStrLn "Hello, world!"
Compile it with ghc (the haskell compiler we installed earlier)
ghc hello.hs -o hello.bin
Then, run the executable!
./hello.bin

Hello, world!
And that’s it! You’ve installed everything you need to be a haskell developer, and you’ve ran your first haskell hello world program!
Don’t worry about the details of the program for now, that will all be explained in good time.
Links to Other Tutorials
If you want to see part one in this tutorial to learn what haskell is and why you should learn it, go here: https://www.rwater.house/post/haskell_part_1/
If you want to see part 3, go to the link here: part 3 will be released Monday, November 6th at 8 am.